A clicking, skipping, or hesitant rear derailleur is one of the most common frustrations in cycling — and one of the easiest to fix at home. Whether your shifting degraded gradually or went wrong after a crash, this guide walks you through the complete adjustment process in five clear steps.
You will need a Phillips or JIS screwdriver, a 5mm hex wrench, and ideally a bike repair stand. The whole process takes about 20 minutes for a full adjustment, or 2 minutes for a quick barrel adjuster fix mid-ride.
Before You Touch a Screw: Pre-Adjustment Checks
Many shifting problems have nothing to do with derailleur adjustment. Before turning any screws, rule out these common causes — otherwise you will be chasing a problem that adjustment alone cannot fix.
Derailleur hanger alignment. Look at the derailleur from directly behind the bike. The cage should hang perfectly vertical. If it angles inward or outward, the hanger is bent — typically from a crash or the bike falling over. A bent hanger makes precise indexing impossible regardless of how well you set the limit screws and cable tension. Straightening requires a hanger alignment tool or a visit to your bike shop.
Chain and cassette wear. A stretched chain causes skipping under load that mimics poor adjustment. Check with a chain wear tool: replace at 0.5% elongation for 11-speed and 12-speed drivetrains. If your chain is past this limit, a new chain on a worn cassette will also skip — both may need replacing together.
Cable condition. Inspect the shift cable for fraying (especially at anchor bolt and lever entry) and the outer housing for cracks or kinks. Corroded or damaged cables create inconsistent tension that no amount of barrel adjuster tweaking can resolve. Replace if in doubt.
Wheel seating. Confirm the rear wheel is fully seated in the dropouts. A wheel that is even slightly off-center in the frame shifts the cassette position relative to the derailleur, causing ghost shifting problems.
1 Set the H-Limit Screw (Smallest Cog)
The H-limit screw controls how far outward the derailleur can travel — preventing the chain from dropping off the smallest cog and into the frame. Setting it first with cable tension removed gives you a clean baseline.
How to do it: Shift to the smallest cog. Turn the barrel adjuster fully clockwise (this removes cable tension from the equation so you are adjusting only the screw). Now turn the H-screw while watching the guide pulley (the upper jockey wheel) from behind. Tighten the H-screw until the guide pulley sits directly below the smallest cog. The chain should run silently with no rubbing against the next cog inward.
2 Set Cable Tension and Index the Gears
This is the step that solves 90% of shifting problems. Cable tension determines how precisely each shifter click moves the derailleur from one cog to the next — a process called indexing.
How to do it: With the chain on the smallest cog, click the shifter once. If the chain does not shift cleanly to the second cog, turn the barrel adjuster counter-clockwise (CCW) one full turn. If it overshifts past the second cog, turn clockwise (CW). Then fine-tune in quarter-turn increments.
Work through the full cassette: shift up one gear at a time, then back down. If shifting is hesitant going to larger cogs (upshift), add a quarter-turn CCW. If it hesitates going to smaller cogs (downshift), add a quarter-turn CW. The goal is one clean, immediate shift per click in both directions across every gear.
3 Set the L-Limit Screw (Largest Cog)
The L-limit screw prevents the derailleur from shifting the chain past the largest cog and into the spokes. This is a safety-critical adjustment.
How to do it: Shift to the largest cog. Adjust the L-screw until the guide pulley aligns directly below the largest cog — chain running smoothly with no hesitation or noise. Then perform the safety check: with the chain on the largest cog, push the shifter lever inward as if trying to shift further. The derailleur should not move any further toward the wheel.
4 Adjust B-Tension (B-Gap)
The B-tension screw controls the distance between the guide pulley and the cassette cogs. Too close and the chain stutters in the largest cogs. Too far and shifting becomes sluggish across the whole range.
How to do it: Shift to the smallest chainring and largest rear cog (the combination that creates the least chain tension). Look at the gap between the top of the guide pulley teeth and the bottom of the largest cog teeth. The standard target is 5–6 mm for most derailleurs. Tighten the B-screw to increase the gap, loosen to decrease it.
| Brand / System | B-Gap Spec | Notes |
|---|---|---|
| Shimano mechanical (10/11s) | 5–6 mm | Visual check is sufficient |
| Shimano Di2 (12s) | 3–4 mm | Use Shimano’s B-gap gauge tool for precision |
| SRAM mechanical | 5–6 mm | Consistent with Shimano mechanical |
| SRAM AXS (12s) | Chain gap tool | Very sensitive — use SRAM’s specific gauge |
| Campagnolo | 5–6 mm | Adjust via the “A screw” near lower pivot on some models |
5 Fine-Tune and Test Under Load
A derailleur that shifts perfectly on a repair stand can still hesitate under pedaling force. Final tuning requires a test ride.
How to do it: Cycle through all gears while riding. Shift both up and down under light pedaling pressure. If any gear hesitates, note whether it is shifting toward larger cogs (needs more cable tension — quarter-turn CCW on barrel adjuster) or toward smaller cogs (needs less — quarter-turn CW). Most riders can reach the barrel adjuster on the derailleur or the inline adjuster while riding.
New cable stretch: If you installed new cables, expect them to stretch noticeably during the first 100–200 km. Plan to add a quarter to half-turn CCW on the barrel adjuster after your first few rides. This is normal and not a sign of a bad setup.
Shimano vs SRAM vs Campagnolo: Key Differences
The five-step process above applies to all mechanical rear derailleurs. However, each brand has specific quirks worth knowing.
Shimano uses a 1.7:1 cable pull ratio, meaning each mm of cable pulled moves the derailleur approximately 1.7 mm. Shimano’s 12-speed Di2 system has no cables — indexing is handled electronically. Fine-tuning Di2 is done via micro-adjust buttons on the shifter: hold both buttons briefly, then click to shift the entire indexing one step inward or outward.
SRAM uses a different pull ratio (~1.1:1 for newer systems) and is particularly sensitive to B-gap accuracy, especially with Eagle 12-speed. SRAM AXS electronic systems adjust via the AXS app or the left shifter’s micro-adjust function. One critical SRAM note: the recommended setup order places B-gap adjustment first, before limit screws and cable tension.
Campagnolo uses a proprietary pull ratio that is incompatible with Shimano or SRAM shifters. The adjustment process is identical in principle, though some models use an “A screw” near the lower pivot instead of a traditional B-screw. Campagnolo EPS and wireless systems offer micro-adjustment through the shifter buttons.
Troubleshooting: Adjustment vs. Hanger Problems
If your shifting is still inconsistent after a careful adjustment, the problem is likely mechanical rather than tuning-related. Here is how to diagnose the difference:
Signs of an adjustment issue: shifting hesitates consistently in one direction across the entire cassette (cable tension problem), chain drops off the smallest or largest cog (limit screw problem), or the problem is isolated to one or two specific gears (cable tension fine-tuning needed).
Signs of a bent derailleur hanger: shifting works well in some parts of the cassette but is poor in others, no barrel adjuster position produces clean shifting across all gears simultaneously, and the problem appeared after a crash or impact. A hanger alignment tool provides a definitive check — this is one of the most underrated investments for a home mechanic.
Other mechanical causes: worn chain or cassette (skipping under load), sticky cable housing (inconsistent shift feel), damaged derailleur spring (weak return to small cogs), or a cracked derailleur body (visible damage or irregular movement).
When Adjustment Isn’t Enough: Upgrading Your Drivetrain
A perfectly adjusted stock derailleur still has inherent friction losses. Standard 11-tooth jockey wheels force each chain link to bend approximately 33° on entry and exit, and their steel bearings generate significant rolling resistance. Think of adjustment as optimizing within a ceiling — upgrading raises that ceiling entirely.
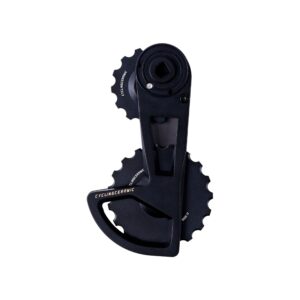
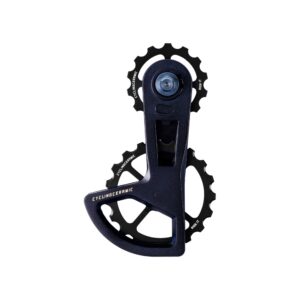
Oversized pulley wheel systems (OSPW) use larger 14/19-tooth pulleys that reduce chain articulation to approximately 19° per link, combined with ceramic bearings that produce a fraction of the friction. CyclingCeramic’s OSPW system offre 3.3W of friction savings — broken down as 2.8W from the oversized pulley principle itself, plus 0.5W from the specific 14/19T configuration used across all CyclingCeramic cage models — plus an additional 0.3W from the aerodynamic cage profile (measured via static wind tunnel testing at 40 km/h, ΔCdA = 0.0002), for a total of 3.6W — independently validated by Friction Facts testing.
If you install an OSPW system, note three adjustment changes compared to stock: the chain length typically increases by 2–4 links, the B-tension screw usually needs tightening (the larger 14T upper pulley sits closer to the cassette than a stock 11T), and complete re-indexing is required. For detailed installation and setup instructions, see the CyclingCeramic OSPW support page.
Frequently Asked Questions
What are the 3 screws on a rear derailleur?
The three adjustment screws are: the H-limit screw (controls how far outward the derailleur can move toward the smallest cog), the L-limit screw (controls how far inward it can move toward the largest cog and spokes), and the B-tension screw (controls the gap between the guide pulley and cassette). On most Shimano and SRAM derailleurs, H and L are labeled directly on the derailleur body.
Which way do you turn a barrel adjuster?
Counter-clockwise (turning it outward, away from the frame) increases cable tension, which moves the derailleur inward toward larger cogs. Clockwise (turning it inward) decreases tension, moving the derailleur outward toward smaller cogs. Always adjust in quarter-turn increments for precision.
How do I know if my derailleur hanger is bent?
Key symptoms: shifting works well in some parts of the cassette but poorly in others, no barrel adjuster setting produces clean shifting across all gears, and the problem appeared after a crash or impact. Look at the derailleur from behind the bike — the cage should hang perfectly vertical. A derailleur hanger alignment tool provides a definitive diagnosis.
Why does my chain skip under load?
Chain skipping under pedaling force is usually caused by a worn chain, worn cassette, or both. Check chain wear with a chain checker tool — replace at 0.5% elongation for 11/12-speed drivetrains. If the chain is new but still skips, the cassette teeth are likely worn. Other causes include incorrect cable tension or a bent derailleur hanger.
How often should you adjust your rear derailleur?
A properly set up derailleur on a well-maintained bike rarely needs full readjustment. Check shifting monthly and fine-tune the barrel adjuster as needed. New cables stretch significantly during the first 100–200 km, requiring a tension increase. Any crash or impact that contacts the derailleur side warrants an immediate hanger and limit screw check.
Products mentioned in this article

Written by
Ilan
SEO Consultant — La Refonte
SEO consultant and content strategist responsible for CyclingCeramic's organic growth strategy. Every article is grounded in Friction Facts test data and real-world cycling expertise.